Sunday 30 December 2012

Some News!

I'm excited to announce I'm now a member of the Counterfeit Kit Challenge Blog Design Team! Yay!

I love this challenge blog, as it always gets me to look through my stash and mix things up. For those of you who don't know about the blog - each month a kit is chosen for inspiration and you're challenged to make your own kit from items your already own - to use up that stash! There's lots of ideas, mini-challenges, and tutorials on the blog to help you out throughout the month!

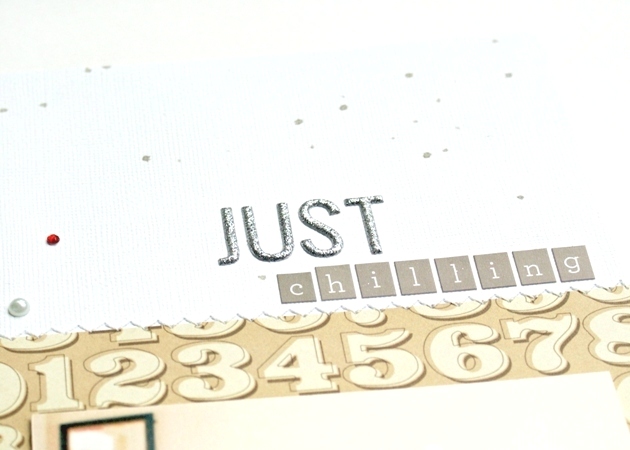
I'll be back on the 1st of January with my first proper CKCB (Counterfeit Kit Challenge Blog) DT post - as part of the blog hop to reveal all the DT's January kits. But for today I thought I'd show you the projects I created for my DT application! We had to make a kit based on this Wood Floor Kit by , and though we only had to make one project with it, I couldn't stop once I'd started and I made two layouts and a card:

6 Months Old:


Love & Lollies:


You Are So Amazing:


All featuring some nice bright yellows and oranges, and some scattered gems and pearls! 

I can't wait to show you what I've been working on for January... so I'll see you again soon! Make sure you check out the Counterfeit Kit Challenge Blog to see the other DT members announced today too! x

Monday 24 December 2012

Merry Christmas!

Hello all. Sorry my blog has been very quiet during December. We've had a variety of illnesses here, nothing serious, but enough to keep me busy when the kids were ill, or feeling rotten when I'd caught it off them! 

I've also been busy with a few deadlines that I'll tell you about when I'm able to! With all that, plus sending out Christmas cards and buying / wrapping presents, I feel quite exhausted. But now we're well, and all prepared, and I'm looking forward to a lovely Christmas Day tomorrow.

For this quick post I thought I'd show you a few Christmas cards that I hadn't had a chance to blog about. There were many more, some that I made in a rush just before visiting people (!), but these are my favourites...

Deck the Halls:


A card using Crate Paper Sleigh Ride, my Slice Design Cutter and the Fa La La card, and some wood veneer snowflakes.

Merry Christmas:


Using Pink Paislee City Sidewalks, some flicks of Heidi Swapp Gold Lame Spritz, and a Craft Tonic Star Punch.

Merry Christmas For You:


I've used up the rest of my My Mind's Eye All is Bright 6x6 Paper Pad now, which makes me feel sad as I loved it so much! There's also Rhinestones, Stickers, and Decorative Tape from the collection on here, plus a bit of silver string.

'tis the season:


More All is Bright on this one. I followed this tutorial from Meghann's Little Corner to make a Washi Tape feather, and I added some gold tinsel-like trim at the bottom. I need to source more of this trim as I love how it shines!

Now I'm off to arrange the presents under the tree, and then get some sleep before the children wake up nice and early! 

Merry Christmas to all my wonderful readers. I hope that all of you, whether you celebrate Christmas or not, are having a lovely few days to finish off 2012 in style. I'll be back again before the end of the year to share some news!

x

Sunday 9 December 2012

Joy Layout ~ for an Elle's Studio Sketch

I had fun today, playing with an Elle's Studio Sketch, and using a photo from 4 years ago...

Joy:


Supplies: Amy Tangerine Ready Set Go 'Why Thank You' Paper, Crate Paper Sleigh Ride 6x6 Paper, Pink Paislee City Sidewalks 8x8 Paper (for the stars). Elle's Studio Tags from the 'Here & Now' kit, The Sweet Life collection, and 'Turquoise Pennants'; and their 'Note Tab' Stamp. Studio Calico Hey Day Alphas, 'Cherry' Baker's Twine, Heidi Swapp 'Gold Lame' Color Spritz, Craft Tonic Star Punch.

The layout was inspired by the Elle's Studio Sketch Thursday for this week:


I changed mine about a bit, but I think you can still see the sketch in my layout! I moved the twine down and twirled it around in loops, because the photo on my page was taken after our presents were unwrapped, so I wanted to look a bit unravelled.

I kept the title in the right place though! Behind the title, and on various other areas of the page there are splashes of gold mist - Valerie Cousins had used distress ink to the same effect on This Layout the sketch is based on. To do mine I splodged a puddle of gold mist onto several spots of the page, and then blew through a straw to make them spread out. You can see the shine better in these close up shots - the mist is Heidi Swapp's 'Gold Lame' Color Spritz - I love how luminous it is:


The journaling reads:

'We were at Granny's for your first New Year's Eve. We opened Christmas Presents and played lots of games, and you sat giggling and smiling at us all. It was lovely to see the joy in you!'

I like the 'Family Love' tag from The Sweet Life Note Tags set, it's subtle but perfect:


I added the 'These Are The Days' and 'Love That Smile' tags to the ends of my twine, a bit like they were the presents that had been unwrapped:


And of course I finished the page off with my usual scattering of gems, plus a few scattered stars, punched with a Craft Tonic punch that I bought the other day, and am now using on everything Christmassy!

Have you ever tried blowing the mist across your page? My daughter saw me trying it out and of course she had a go with watercolour paints on spare paper. She didn't have quite enough puff, but she liked the patterns it made!

Have you been crafting this weekend? x


Friday 7 December 2012

Just Chilling

Here's my cheeky boy, looking all chilled out, watching TV in his sister's chair, and melting my heart with his cuteness:


Supplies: American Crafts White Cardstock, Studio Calico Classic Calico 2 'Numerical' Paper, Crate Paper Sleigh Ride 6x6 Pad, Pink Paislee Portfolio Alphas, Simple Stories Sn@P Alphas, Stamps from Pink Paislee, American Crafts, and Banana Frog, Mister Huey 'Clay' Mist, Gems from Papermania and Hero Arts, 3D Foam Dots, Black Ink Pad, Sewing Machine and White Thread.

I love catching moments like this, as I know they're the ones I'm going to love looking back at in years to come. Plus I adore stripy clothes on my kiddies, so this babygrow is one of my favourites!

I added the heart detail surrounded by gems and pearls, to show how the moment captured my heart. I placed it up where his eyes are looking towards so he's not looking up at an empty space, and the arrows are stamped around the edge to bring the attention back down to his face:


The papers are stitched on with a zig-zag stitch to soften the edges, and I stamped some bunting to write my journaling on top of:


Finally I kept the title sweet and relaxed like the photo:


Have you captured any chilled out moments on your layouts lately? It makes me feel at peace just looking at this page, which is something I need right now, to calm me down in between the frantic preparations for Christmas. I've still got so many cards to write and presents to buy!

Finally - I'm still waiting to hear from NikkiD to claim her Frosty Festivities prizes. If anyone knows a way to contact her please can you let her know? If I haven't heard from her by next Thursday (13th December) then I shall re-draw the prize!

Bye for now, x

Thursday 29 November 2012

The Frosty Festivities PDF, and the Challenge Winners!

Hello! This took me a little longer to put together than I expected, but The Frosty Festivities PDF is now available!


Just click HERE! 

You should then be able to view, download, or print the PDF, it's 40 pages packed with festive prettiness! PLEASE NOTE when you first click through it might take a little time to open on your screen, because the file is large. So if the SkyDrive screen looks blank to start with just leave it open for a minute and the PDF should appear!

 You can keep lots of the projects from the Frosty Festivities weekend, both mine and some of the Blog Hop posts, readily accessible for when you next need some inspiration!

Just please only keep this for personal use - and if anyone else wants a copy ask them to come to this blog post to download it themselves!

This is the first time I've made something like this, so I'd be grateful for any feedback, especially whether you think this is useful (I don't want to spend hours on a PDF again if it's no use to anyone!). Let me know in the comments below or by email at jennifergrace (at) hotmail (dot) co (dot) uk. Thanks!

And now, to announce the winners of the Frosty Festivities Challenges!


Congratulations winners! 

 (details of entrants to each challenge, and the random number generator to select the winners, are available as a word doc if requested)

Please contact me by email (address above), with 'challenge winner' in the subject line. Tell me your mailing address so I get get your prize on it's way to you!

Thank you so much to everyone who entered, I loved looking at all your projects! I hope you'll be back for the next event in May or June 2013.

Finally, I have a shameless request for votes! I've entered my 'Advent Wishes Jar' into a Christmas Craft Competition. If you are on Pinterest, and you thought the project was good, could you please click HERE and 'like' the project on the competition board? Who ever gets the most 'likes' wins an Amazon gift card so I'd love to win! And there's still a bit of time to enter something of your own if you want to!


Well, that concludes the Frosty Festivities posts (for this year at least!). Jennifer's Jumbles can now resume regular programming. I hope you are all feeling nice and festive now! x

Thursday 22 November 2012

More Winners - and thanks to all who entered!

It's time to announce some more Frosty Festivities winners! 

But first I want to say thank you to everyone who entered - I'm sorry you can't all win. I wish I could come up with a prize for each of you, as I'm so grateful to you for visiting my event and leaving such fabulous comments!

Supplies mainly Pink Paislee City Sidewalks

Don't get too disappointed if you're not a winner - remember the Challenges are still open until Sunday (you can see links to them all on the Finale Post here). You can also look forward to the next event, I'm planning it for sometime in May/June 2013! 

If you'd like to be added to my email list, to be contacted about future giveaways, events, or classes at Jennifer's Jumbles, then leave me your email as a comment, or send it to me at jennifergrace (at) hotmail (dot) co (dot) uk. Your email address will not be passed on to anyone else, and it will only be used for above information - I won't start filling up your inbox with random updates! (If you've already left your email address on the survey then I've got it - thanks!).

I'll stop babbling now, as I know what you really want to know is - who won? Here's the answers:


Congratulations!

Winners need to email me with their mailing addres - please put 'giveaway winner' in the subject line. I shall get your prize sent to you as soon as possible!

Thanks again to everyone who joined in - and remember to enter the challenges!

x

 (details of entrants to each giveaway, and the random number generator to select the winner, are available as word docs if requested)

Thank You to Sponsors - And Winners of Sponsored Giveaways!

This post announces the winners of the Sponsored Giveaways from my Frosty Festivities weekend. But before I tell you the winners, I want to say a big, huge, THANK YOU to the sponsors!

Supplies mainly Crate Paper Acorn Avenue


The weekend wouldn't have been the same without the generous prizes from SJ Crafts, talktothesun, and Scrap and Create!


I'm incredibly grateful to these wonderful shops for offering prizes! 

Whether you are a winner or not it would be lovely if you can show support to these shops by visiting them next time you want to top up your crafting supplies. Remember that Jayne is offering 3 bonus flair buttons to anyone that orders from Scrap and Create between now and 15th of December, quoting 'Jennifer's Jumbles', and don't forget to keep an eye on SJ Crafts and talktothesun's Facebook pages for updates or special offers!

Without further delay, here are the winners of the Sponsored Giveaways:


Congratulations Winners!

Please contact me at jennifergrace (at) hotmail (dot) co (dot) uk (you could also click the envelope icon in my right sidebar to send me an email) - put 'giveaway winner' in the subject line. From Nikki D I need your mailing address, from Marilize and Louise I need to know if you have an Etsy username. These details will then be passed on to the shop owners, so they can sort out delivery of your prize to you!

I shall be back in about an hour to announce the winners of the Grand Giveaway, the Blog Hop Prize, and the kit of Old Christmas/Winter Stash! 

In the meantime don't forget that the challenges are still open (the Finale post has a link to them all), and, if you haven't had a chance to fill out my survey yet, I'd be so grateful if you can do that here. (Thanks to everyone who's already filled the survey out!)

x

(details of entrants to each giveaway, and the random number generator to select the winner, are available as word docs if requested)

Sunday 18 November 2012

The Frosty Finale!

Oh, it's come to the end of a wonderful festive weekend! I'm exhausted but I've had so much fun! 

I have one last item to show you, and a request for you to fill out a survey about the event, but first I want to remind you of all the giveaways and challenges in case you missed any of them:


The Challenges - These are STILL OPEN until next Sunday (25th November) at 10.59pm GMT:


The Giveaways Are Now CLOSED! Winners will be announced Thursday 22nd. Thanks to all who entered!
There were plenty more posts, full of tips and tutorials, but I can't link back to all of them! My favourites will appear on my 'Tutorials' page at some point! There will also be a PDF available to download, featuring lots of the tutorials and projects by myself and others, but this will not be ready until all the giveaways have closed, so keep checking back! 

Before I show you one final item, I'd like to say a huge THANK YOU to everyone who's visited this weekend, and commented, and some of you have started entering the challenges too. I feel so blessed to have you lovely people reading my blog, I love sharing my crafts with you, and hearing all your comments - it's great to get to know you too.

Obviously I put a lot of work (and money) into the event. I absolutely love doing it so it's really, really worth it. But I'd be so grateful if, in return, you could just fill out this quick survey about the event and the Jennifer's Jumbles blog. It's only 8 questions, so it shouldn't take too long, and you'd be really helping me to plan for future events!

Here's my final project, an idea for gift wrapping using doilies. They'd look great under the Christmas tree:


The gift wrapping is quite easy to make: 

One has paper doilies glued onto brown wrapping paper using spray adhesive, I've tied this package up with lace trim from a haberdashery:


Another has four paper doilies glued together at the edges, and then wrapped around a tissue paper wrapped present. I've tied that gift with a tape measure:


The last is a cone for sweets or chocolates, made by cutting into the middle of a paper doily, then curling it in on itself until it forms a cone, and glueing in place. I attached a red polka dot ribbon to hold it with, or to hang it from a Christmas Tree.


I like the cone the best, but that might be because I'm craving some chocolate right now!

One last Be Inspired: Use a doily on your next project!

Thanks so much again. Don't forget to fill out the survey if you can. I shall look forward to seeing you at the next event, sometime in 2013!

Frosty wishes to you. x

Winter Woollies Recycling

(This post is part of my Frosty Festivities Blog Event)

I saw this pin on Pinterest, and I had to try out the ideas to recycle some winter woollies! I popped to the local charity shop, and picked up this jumper-dress:


And so far I've turned some of it into a bracelet (by following this tutorial):


And this pair of mittens (by following this tutorial):


I love them both! And I've got lots of material left - I'm planning on a scarf and a cushion cover. All from a jumper for £2! I shall be looking out for more!

Be Inspired:
  • Use a pin on Pinterest to inspire you 
  • Alter something old that needs a re-vamp
  • Add some wool to a project
Don't forget that a comment on this post, or on any of my posts from this weekend, will count as an entry into the Grand Giveaway {NOW CLOSED}- but only if you've registered your interest in winning that here!

Have you ever recycled old clothing into something new? See you soon for the Final Frosty Festivities post! x


A Challenge - To add Glitter or Shimmer!


(This post is part of my Frosty Festivities Blog Event)


It's in the sparkle of frost, the twinkle of fairy lights, and the glitter on baubles. So now I challenge you to add some shimmer to a project - go crazy with it!

I think by now everyone knows that my favourite way to add sparkle is with gems and pearls, and this layout is no exception:


The journaling reads:

'We went for a family walk at Upton Country Park, and it was so super frosty! The leaves crunched underfoot, and the pond was iced over really thickly. We dried dropping stones on the icy pond to break it, but they just skidded across it to the far shore. It all felt like a magical other world.'

I used a mix of Crate Paper's Sleigh Ride and Acorn Avenue collections, I love the stripy Thickers:


The gems are a mix of Papermania, Hero Arts, and Kaiser Scrapbook. They shimmer nicely, and with the pale leaves from Acorn Avenue, they set the scene very well:


Be Inspired:
  • Add lots of shimmer, glitter, or sparkle 
  • Mix two collections from the same manufacturer
  • Place all your details in a central square panel
So now it's your turn!

To enter this challenge: make a craft project and add lots of Glitter or Shimmer (your favourite kind), blog about your project (or upload it to an online gallery), and link back to this post. Then come back here to link your project up! You can combine this with other challenges.

The challenge will close next Sunday, 25th November at 10.59pm GMT. All the challenges are open Internationally.

The winner will receive a mystery pack of papercraft supplies! I'm not sure what will be in it yet, but it will definitely include some shimmmer - there will be a whole pack of these in there:


And lots of other stuff too!

Don't forget that a comment on this post, or on any of my posts from this weekend, will count as an entry into the Grand Giveaway {NOW CLOSED} but challenge still open!- but only if you've registered your interest in winning that here!

The event is nearly over - two posts to go! The penultimate one will appear soon! x

'Snow is Too Cold' Layout

(This post is part of my Frosty Festivities Blog Event)

I don't often do Double-Page layouts, but every now and then there's a few photos that I want to use in a large size without hiding them, and I have a longer story to tell. That happened here:


This was my daughter's first experience of real snow, and she wasn't too sure about it, which shows in her expression:


The journaling reads:

"We don't get snow this deep at home, so this visit to granny's was your first walk through proper snow. We wrapped you up warm (you wore Auntie Katy's hat) but you still weren't sure - you kept saying 'it's too cold'! You didn't like touching it to build a snowman, and we had to carry you over a lot of drifts as you didn't like the crunch underfoot!

You like snow a lot more now, but I will never forget your confused little face from that chilly January day!"

We kept trying to coax Little Miss to play more in the snow, but she wasn't budging:


I brought the pages together by using 2" punched circles down an edge on each, and slanting some washi tape across them both to draw your eye across the page:


Be Inspired:
  • Slant some washi tape or patterned paper across the top or bottom of a page or card
  • Use a line of punched circles or other shapes
  • Make a project in a larger size than you usually would


Don't forget that a comment on this post, or on any of my posts from this weekend, will count as an entry into the Grand Giveaway {NOW CLOSED} - but only if you've registered your interest in winning that here!

Do you make many double page layouts? I'll see you again, right here, in an hour! x

Wonderful Winter Hats

(This post is part of my Frosty Festivities Blog Event)

One of the things I love about winter is that I can grab the duffel bag full of woolly hats, scarves, and gloves down from the top of the wardrobe, and start wearing them again! I'll admit I'm less excited about the gloves since we had children and I have to spend ages putting them on the kids, only for them to lose one 3 minutes later!

I still LOVE hats though! There's something so comforting about wearing a woolly hat. Here's two of my favourites:

Grey Hat With Snowflakes:


I bought this for myself years ago, when I used to work at Claire's Accessories. I love it because it covers my ears so well, and I can even tie it under my chin to really keep the cold air out when it's windy - perfect for wintry seaside walks!

Christmas Pudding Hat:


My Mum bought this for me for Christmas two years ago, and it's so fun to wear! It makes me feel very festive, and I love to wear it in the run up to Christmas, and definitely if we go for a stroll on Christmas day!

I had lots of warm winter hats, but until recently I didn't have any pretty 'occasion' winter hats - the kind you could wear to meet up with friends and feel special. I know it won't keep my head warm at all, but I love this new winter fascinator that I made.

Winter Fascinator:


It's got perfect frosty hues, and even a little bit of twinkle! I made this at the 101+ Ways With Glitter Book Launch, with the help of Hatastic who ran the workshop!

Be Inspired:
  • Go take photos of your favourite winter wear, and blog about it or scrapbook it (or both!)
  • Make a winter item with felt and sparkles
  • Make a project that looks like a Christmas pudding!

Don't forget that a comment on this post, or on any of my posts from this weekend, will count as an entry into the Grand Giveaway {NOW CLOSED} - but only if you've registered your interest in winning that here!

Do you wear woolly hats in the winter? I'll be back shortly! x

A Trio of Tags

(This post is part of my Frosty Festivities Blog Event)

I've made a set of tags, and though each one uses products from different manufacturers, they all go together nicely.

A Trio of Tags:


I pulled them all together by using similar colours, techniques, and elements. 

They all have the same background shape, cut with my Slice Design Cutter and the Basic Elements card (on 4" setting). The edges of all the tags are distressed. Then each one has a white panel that has gold mist droplets on it, and red inked edges. 

Finally I layered on some elements, making sure each tag had something that peeked over the edge, and they also all have some stars:


Crate Paper Sleigh Ride - The star on here was cut using the Slice Design Cutter, and attached with pop dots.


My Mind's Eye All is Bright - after sticking on the 'Noel' sticker I flipped the tag over, and applied talcum powder to the ends of the sticker that were still showing.


Pink Paislee City Sidewalks and Artisan - The reindeer is from the paper bunting set, but it looks just as good stuck straight down on it's own.

Be Inspired:
  • Choose a few of the same colours / techniques / elements, and use them to make a trio of tags or cards
  • Stick on some stars - they're always Christmassy
  • Do some distressing on your next project

Don't forget that a comment on this post, or on any of my posts from this weekend, will count as an entry into the Grand Giveaway {NOW CLOSED} - but only if you've registered your interest in winning that here!

Do you make tags for gifts at Christmas, or do you just use shop bought ones? Bye for now! x


Where else I've been Wintering

(This post is part of my Frosty Festivities Blog Event)

I have been preparing lots for this weekend (as you've probably guessed), but I've had a few other winter projects to complete for elsewhere too, and this hour I thought I'd share them with you!

I'm sorry to those who are regular readers and might have seen some of these before, but I shall start with something you're unlikely to have seen (I haven't told you about it, but you may have heard of it elsewhere!)...

Snowed In Magazine:


Ashley Pahl's free online Snowed In Magazine is full of extremely lovely seasonal delights, including crafts and recipes. It also features a pendant by me! It's completely different to the other pendants I've shown this weekend, you'll have to go and check out the magazine if you want to see it!

Speaking of magazines, I was also in the Christmas special of the Popular Crafts magazine (sadly the last ever issue of Popular Crafts) with this mini-album:


It documents our Christmas decorations. Sorry you can't see this magazine online, it's only available in UK stores I believe, but I did blog about our Christmas decorations as my 10 things on the 10th post last December - you can see it here. 

Finally, in case you missed them, I featured in two wintry posts on the SJ Crafts Blog this week. One was all about me, and how I'm Inspired by Winter, which is here, and the other was the latest SJ Crafts challenge, on the theme of Christmas, which is here and features this layout by me:


Please check all them out if you haven't seen them already!

Be Inspired:
  • Create a mini book which could be used as a decoration, to document your winter or Christmas
  • Put a giant gold bow onto a project
  • Find something in a magazine to use as inspiration for a winter-related activity

Don't forget that a comment on this post, or on any of my posts from this weekend, will count as an entry into the Grand Giveaway {NOW CLOSED} - but only if you've registered your interest in winning that here!

I'll be back at 5pm! (I hope!) x

Kids Crafts at Christmas

(This post is part of my Frosty Festivities Blog Event)

I love crafting with my kids at Christmas. My daughter always makes some cards, and there will be some baking involved at some point, plus each year we make some decorations. 

This year so far we've made these Peg Doll Angels:


I got the idea and tutorial from here. We jazzed ours up a bit, making the dresses out of white felt, which my daughter drew on and stuck sequins all over. She also drew on the faces and hair, and helped me cut the feathers. Then I wound on the halos and glued all the bits together using a hot glue gun.

I haven't decided yet if we're going to hang them as decorations or leave them as dolls. My daughter wants to give one each to her two best friends, so we'll only be keeping one of them:


I've just realised one of the angels has a wonky halo in the photo, and it's the one with the slight smirk. I think she's been at the sherry!

My daughter has also painted a snowflake window decoration that we got from HobbyCraft, she was concentrating on it very well:


And I know we'll be making our usual Reindeer - we draw around feet for the head and hands for the antlers, so each year the reindeer grow as my kids do! Eventually we'll have a whole gallery of them, but this photo is from the first year we did it, using my hands and feet and my daughter's:


They look very cute lined up on our wall each year!

Be Inspired:
  • Use feathers on your next winter project
  • Make a window decoration
  • Use your hands as a template for something, or do some finger painting!

Don't forget that a comment on this post, or on any of my posts from this weekend, will count as an entry into the Grand Giveaway {NOW CLOSED} - but only if you've registered your interest in winning that here!

Have you ever done any crafting with kids at Christmas time? Any tips for what we can make next?

See you again soon - sorry the posts are running half an hour behind - I'm trying to catch up on finishing them off! x

Related Posts Plugin for WordPress, Blogger...