Thursday 28 February 2013

I'm a Night Owl - The Get-To-Know-You CKC Blog Hop

Hello! For a final blow-out for our February Counterfeit Kits, some of the Counterfeit Kit Challenge Blog Design Team are taking you on a hop to get to know us as individuals a little better! You should have arrived via the wonderful Jemma at Just Jimjams, and I'll send you onwards at the end of this post!

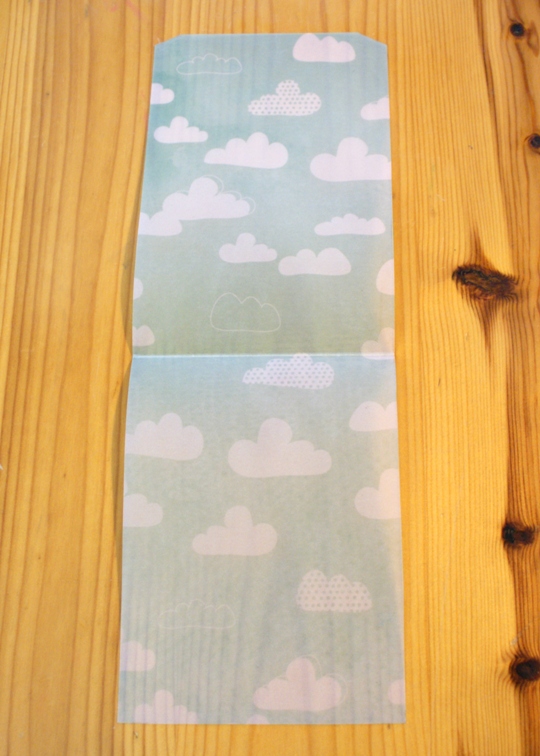
We've made some projects, inspired by one or two journaling sheets from the lovely Christie Zimmer at Grace is Overrated. I chose to use the 'anti-to-do-list' which you can find on Christie's blog HERE.

Here's mine all filled in (I added a bit of colour round the edges of mine with washi tape and stamps from my kit):


When reading over this and thinking of a project to make, what most jumped out at me was how much of a night owl I am. I was filling the sheet out at about 11pm at night, I still had lots to do, and my mind was buzzing with ideas. I was multi-tasking lots of things at once (watching tv, printing party invites, filling out this journal sheet, and about to start a stack of ironing). I don't often go to bed before midnight, as I'm most productive at night. So I documented this part-of-me on my layout.

I am a Night Owl not an Early Bird:


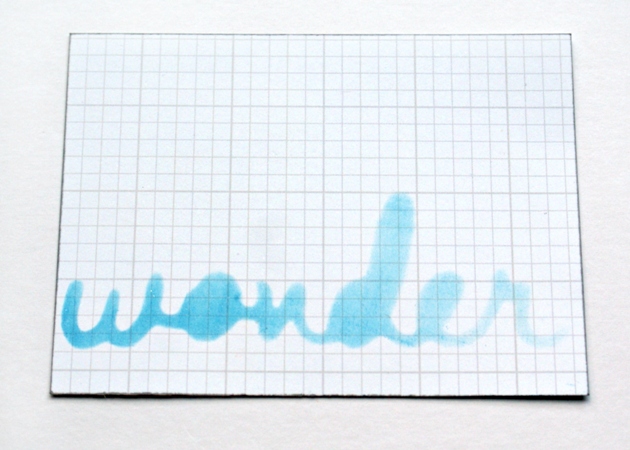
If you can't make out the journaling, it reads:

'Most evenings I will be up until mid-night. I have lots to do in the evenings...blog reading, dishes, ironing, crafting, watching tv. I'm usually doing at least two of these at once! If I try to go to sleep any earlier then I just lie awake for hours - things whirl around in my head. It's better if I feel I've achieved lots! And no matter how late it is when I go to bed, I always find a few minutes for a game of Bejewelled Blitz!'

The black chevron bit at the top right of the page, which looks like tape, was actually part of the Pink Paislee Portfolio paper. I just cut around the bottom half of it with a craft knife and slid my other sheet of paper underneath, so it looks like it's taped into place:


The cute owl is cut using my Slice Design cutter and the Fall/Back to School Design Card. I had fun building a little background for him using embellies in my kit:


So tell me, are you a night owl, an early bird, or somewhere in between? 

Now it's time for you to hop onwards to the fabulous Julie at His Glory Girl. If you get lost anywhere along the hop then here's the full list for you:


You Are Here * Jennifer http://www.jennifersjumbles.blogspot.com/ *You Are Here

And don't forget that tomorrow is the reveal of the March Counterfeit Kits, so they'll be another Blog Hop for you to enjoy tomorrow morning! In fact, I'm also joining in with the Paperhaus Spring Fling Blog Hop tomorrow, so things will be busy here! See you then! x

Monday 25 February 2013

Cards for all!

I've been using up my February Counterfeit Kit by making some quick cards, for a variety of people or occasions:


I don't know who these are all destined for yet, but they'll go happily into my card box for when I need a card in a hurry! 

It make me feel good to have made a big dent in my kit too. I know I'm going to have some stickers and alphas left at the end of the month, but that's okay. Most of the papers should be gone! Do you ever make a batch of random cards just to plough through a bit of stash? x

Wednesday 20 February 2013

Things to tell you... and a giveaway!

The wonderful Sian at From High in the Sky is running a very interesting series called 'So this is Scrapbooking', and she invited me to join in and tell my story. So if you'd like to read more about how I discovered scrapbooking and what it means to me, then go check it out here!

One thing you may notice on that post is a bit of news - I'm currently working on a new blog, to replace this one. Don't worry, the stuff you love at Jennifer's Jumbles will continue at the new blog, you'll just need to change the address you're following! The new blog is not quite ready ready, but if you want to take a sneaky peek at the work-in-progress, or start adding it to your reader, then you can - the address is www.jennifergracecreates.com.


In the meantime I'd love it if you'll tell me what you'd like to see at the new blog, so I've created a survey with 10 questions, to ask what you'd like to find at Jennifer Grace Creates.

Anyone who answers the survey can enter to win a giveaway for a surprise box of papercrafting goodies! I'll stuff a pizza box with a mix of old and new items. Just make sure you leave an email address in the right box on the survey so I can contact you if you win. The closing date is Friday 22nd March, and the winner will be notified by Sunday 24th March. The giveaway is open internationally.

The survey is HERE!

Thanks very much for taking the time to read my blog, your support is much appreciated! You are welcome to leave a comment on this post, but please be aware that only answering the survey will enter you into the giveaway!

And don't forget to go and check out my guest post at From High in the Sky! x

Tuesday 19 February 2013

Red Arrows (A Counterfeit Kit Layout)

I had set aside this photo of the Red Arrows to use with my February Counterfeit Kit, because there was lots of blue in the photo, as well as in my kit. But when trying it out on the blue papers I realised there would be too much blue, and what it really needed was a strong contrast. So I was very pleased I'd stuck this bold red paper into my kit as well:


The design of this page is quite uncluttered for me, but I still managed to fit on a fair few embellishments - mainly lots of arrows! I hadn't noticed before how the red triangle button could look like an arrowhead, so it was perfect for this page! 


Everything is from my kit, except a gold ink pad used to stamp the star tab. The tab is attached to a photo that's tucked behind the journaling panel:


I love the photo even though it isn't the best quality picture, as my daughter had this expression on her face the whole time we were watching the Red Arrows - half astonishment and half confusion! She asked a lot of questions... 'How do they fly so fast? Why does their smoke change colour? Why are they so noisy? Where are they going?' These questions and some private journaling are documented on the back of the photo.

Have you ever seen a Red Arrows or similar airshow? This was the first time I'd seen them since I was a kid so I was thrilled by it too. We hope to go again this year, as it's a free event each year as part of Swanage Carnival, just down the road from us!

Have you been crafting lately? Don't forget to keep an eye on the Counterfeit Kit Challenge Blog  for inspiration! x

Thursday 14 February 2013

Some News!

Hello! Happy Valentine's Day! I've some news to share today - I'm now a PaperHaus Magazine Contributor! Whoop!

If you haven't heard of PaperHaus, then go check it out - it's a free online magazine showing amazing papercrafts - lots of luscious layouts, cards, tags and more. I have got so many ideas from looking at the previous issues, and I'm really proud that my work will be included from now on!

There's not long to wait until the Spring issue, which shall be the first one which I've contributed to. To celebrate the Spring issue's release, there will be a whole lot of fun during the Spring Fling:


Lots of the contributors will be participating in a blog hop, with giveaways on their blogs, so I'll be back with that! And there will be tons more to see on the PaperHaus blog, and the Facebook Page. And there will be the Spring Issue of the magazine to read, of course!

So excited about this, make sure you check it all out when it begins on 1st of March!

In the meantime, the call for submissions for the Summer Issue has just been released, so check it out if you'd like to submit a project or two for consideration. All the details are HERE.


Have a great day! x

Sunday 10 February 2013

Wobbly Walking & Bouncing About

 I have been using my gigantic February Counterfeit Kit, honest! Here's a couple of layouts to prove it...

Wobbly Walker:


This one shows one of the first pictures I took of my son walking - with a helping hand or two. He looks so pleased with himself!

I had fun adding lots of sentiments to this page to capture the memories - to try and keep the day as fresh in my mind as it is now. I especially like the 'I treasure this moment' stamp by Elle's Studio, and the 'Happy Days' brad by Papermania:


My handmade journaling card was perfect to sum up the moment, and I like how the ombre effect creates a sense of movement:


The arrow at the top left is pointing to the number '1' because that's how old he was - I like this little extra detail that you might not notice on first glance.

Bouncing About:


This was the first time my kids bounced on a see-saw all by themselves! It was a cold day, but they had so much fun. It took me a while to think of a title for this one, but I settled on 'bouncing about, enjoying life', using mini alphas and an Elle's Studio 'Lil' Snippet':


My handmade vellum envelope was a great place to hide some extra journaling about all our trips to the play-park, and why this day was especially nice:


I'm glad scrapbooking helps me capture all these moments when they get on together, but I should probably do a page soon about all the fights they have too - I don't want the record of our lives to look too unrealistically perfect! They've had some dissagreements today, about whose turn it was with the ball, who gets the biggest snack, and who gets to sit on the wooden chair - to name just a few!

Do you document the imperfect moments too? Or you prefer to keep your albums happy and lovely?

I'm going to keep using my mammoth Counterfeit Kit, though it's going to be difficult to stick to it, as I've bought lots of new goodies from Elle's Studio and Glitz Designs, and they cannot be ignored...! x


Wednesday 6 February 2013

A Sweet Day-Dream (MME Layout)

Do you know that My Mind's Eye and Gossamer Blue are holding a contest for a guest designer? 
The details are HERE.

I made this layout to enter into the contest:


I wanted to create a cool but dreamy feel to match my little boy's far-off look - so I added lots of shiny droplets, tone-on-tone stars, and some clouds. Two of the clouds came from a doily sticker that I cut in half, and the larger cloud is a chipboard piece that I added White Liquid Pearls to:


The stitching at the top of the page has one little kiss stitched on top:


And I used a woodgrain stamp from the 'Miss Caroline - Dolled Up' collection to add an extra texture to the left of the journaling, I think it echoes the pattern on the ground in the photo, and it keeps the layout boyish, balancing out the other delicate details:


The journaling reads:

You are usually charging about and getting into mischief, so I was glad to capture this rare moment of you sitting still, on the end of a playpark slide, staring into space.
I wish you could tell me what your day-dream was about - I hope it was sweet and lovely. I'm sure you'll have many more day-dreams to come, but I don't mind you running around and being boy-ish in the meantime!

I hope I've managed to make a page that captures the sweet, still moment. We don't get many of them round here!

I'll be back in a couple of days with some Counterfeit Kit layouts, x

Supplies: My Mind's Eye The Sweetest Thing - Bluebell 'Playful - Lively' and 'Smile - Bouquet' Papers, 'Smile'  and 'Playful' Stickers, and Tangerine 'Together' Enamel Dots, Lost & Found 3 Oliver sticker Accessory Sheet, Lost & Found 2 Breeze 'Everywhere' Label Stickers, All is Bright Decorative Tape, and Fine & Dandy 'True Blue' Chipboard. Glitz Design Teeny Alphas 'Cashmere Dame - Tiffany Blue', Hero Arts Clear Gemstones, Heidi Swapp 'Gold Lame' Color Shine Spritz, White Opal Liquid Pearls, Craft Tonic Mini Star Punch, Slice Design Cutter and Basic Design Card (to cut the word 'dream' from cardstock), American Crafts Roller Date Stamp, Black Journaling Pen, Dark Yellow Thread, Grey Ink Pad.

Sunday 3 February 2013

Oh How I Love To Read - A Challenge Mini-book

Challenge One is now live on the Counterfeit Kit Challenge Blog, and it's one that's a real challenge: to create a page or project with no photos, only journaling, about 'why I love ____ '.

I quite enjoyed this challenge! I always have lots of things I'd like to record, but because I don't have photos, they tend to get forgotten. For my project I ended up with a mini-book, as I was inspired by my theme 'Oh how I love to read' to use an old book to record my favourite novels in:


I'm going to show you how I put the book together, and then show you all the pages in case you wonder what my favourite books are (I warn you they are mostly Children and Young Adult Fantasy Novels)!

Here's the construction:


Step 1: Cut the front and back covers off an old book, using a craft knife and a steel ruler. I used a poetry book I picked up at a car boot sale for 20p, as I loved the yellow pattern!
Step 2: Cut a length of fabric approx 2.5" wide, and 3" longer than your covers (so there will be 1.5" to spare at each end). Use pinking scissors to stop the edges fraying.
Step 3: Use a hot glue gun to attach the fabric to your covers as a spine. Glue onto the outside of the covers first - make sure they are level, and leave a 1" gap in between them. Then fold up the top and bottom flaps onto the inside and glue them with hot glue too. Mark a pencil line 1.5" down from the top and 1.5" up from the bottom (I've added arrows to the photo as it was hard to see the pencil marks).
Step 4: Cut another strip of fabric that's 1" wide, and 1" less in length that the height of the book. Add hot glue above the top pencil line, and attach the top of this fabric strip. Then slide on a small book ring. Add more hot glue from below the book ring, to the next pencil line. Then slide on another book ring, and glue down the end of the strip. Done!

Now you just need to decorate the front cover:


I used all bits from my February Counterfeit kit. The doily flowers are punched from one of the 6x6 papers, using a Martha Stewart Vintage Doily punch.

I also used my kit for all the pages, cutting them to different sizes. I used the Echo Park sticker sheets, a bit of washi tape, and some misting with a wood arrow for a mask, for embellishments. The only extra pages are the front and back pages, which were original pages from the poetry book. I stuck two pages together to make them a bit stronger, and then used gesso to cover up the front of them for writing on:


I love my mini-book! I hope to keep adding to it, as I find or think of more books that I love. Hopefully one day my kids will look through it to see what books they might like to try! 

So, are you going to take up the challenge? If you need more inspiration there are more DT examples HERE. Or there's also the 'Progress' layout I made last month that had no photo! I'm going to try and do another 'no photo' layout for the member's blog hop later in the month, which you could be part of if you want to take up the challenge!

For those wondering, my sister didn't get a placement at a Camp America camp yesterday. We stood for 2 hours in the cold to queue up for the event, and by the time we got in all the positions had been snapped up by the people ahead of us! She can still apply online though, so fingers crossed. And we had a nice time in London, including dinner at Chiquitos, so it was a good day anyway! See my instagram photos in the right sidebar for some of the photos I took!

x

Saturday 2 February 2013

Vellum Bags and Journaling Cards Tutorials!

Good day to you! Today I'm going to show you how I made these Vellum Bags and Ombre Journaling Cards for my February Counterfeit Kit:


First of all I made myself a template for the bags. You don't need to make one though - you can just download mine from HERE. To get the same size bags as me (mine are a smidge over 4" wide by 6" tall) you'd need to print this on A3 paper, but you are welcome to print it at other sizes, cropping the jpeg if necessary - your bags will just be a bit smaller.


Print the template, cut it out (don't cut the tabs off), and draw around it onto a piece of vellum (this is an old piece of Papermania vellum):


Score and fold in the bottom half of the bag, and the side tabs:


And then stick the tabs down! At first I used vellum tape, but the bag kept opening up, so I used a glue stick instead which seems to be holding it better!


If you don't want to stick the tabs down, you can do this second option. For the cloud bag (vellum is Dear Lizzy Neapolitan 'Silver Lining' I cut off the side tabs and just folded the bottom of the bag upwards:


And then machine-stitched up the two sides! Simple as that! It means the space inside the bag is slightly narrower though, so bear that in mind if you make one with stitching:


I can't wait to slip some journaling or ephemera in to these bags!

Now for the Ombre Journaling cards, these are really easy...

Step 1. Cut some words or shapes from scrap card. I used my Slice Design Cutter for the words, and I cut the triangles freehand. You could also use punches. (I backed some of the holes here with colours so you can see them easier in the photo):


Then place the card with the cut shapes on top of a journaling card - my cards are 3x4", I cut them from some Simple Stories Sn@p 'Just the Basics' papers. Use an ink pad to ink through the holes, putting more pressure and going more times over one end than the other, to create an ombre effect:


Ink the edges of the journaling card too. That's it!


Both these handmade items are quite simple, which I hope means they'll be good for all kinds of projects! Have I inspired you to make some of your own?

Today I'm away from home, I'm off to help my sister choose a Camp to be a counselor at, there's a Camp America recruitment fair in London. Wish her luck! x

Friday 1 February 2013

My February Counterfeit Kit - DT Blog Hop!

Hello and welcome to a new month of Counterfeiting! If you don't know what this is all about then head over to the Counterfeit Kit Challenge Blog, where lots of lovely scrapbookers spend each month making kits from their existing stash, and then using it up!

Today is the reveal of all the Design Team's February Counterfeit Kits. You should have arrived here from the wonderful JimJams, but if you've missed any out you can always go back to the start and see the Master List. Once you've taken a look at my kit you should be hopping on to the lovely Julie! This month our kits are based on the fantastic 'Chasing Pavements' Kit by the Scraptastic Club. It's full of greens, blues, arrows and chevrons. Here's my take on it:


I may have made a slightly larger kit than I did last month. Okay, it's a lot larger! When I first saw the Chasing Pavements kit I knew I had lots of newer stash that I could use for it. But I wanted to make sure I was using up old stash, so I went through my older stuff first, found lots, and then still chucked the newer stuff on top! There's nothing wrong with a big kit, right? It just means I have a lot of creating to do this month...

I also added some pops of red and orange to my kit, taking inspiration from the Studio Calico arrows in the Chasing Pavements kit. I knew I'd find it hard to stick to green and blue!

Here's the papers, large sticker sheets, and alphas:


12x12" Papers: Crate Paper Storyteller 'Tomorrow', Pink Paislee Portfolio 'Unbelievable', Heidi Grace A Little Bird's Tale 'Story', Pink Paislee Portfolio 'Amazing', Echo Park For the Record 2 'Chevrons', TPC Studio Blips and Bleeps 'Stacking Up', Cosmo Cricket Odds and Ends 'Junk Drawer', Echo Park This and That Charming 'Swirls', Basic Grey Aged & Confused 'Corrugated', Making Memories Children at Play 'Paper Toys', Basic Grey Aged & Confused 'Pharsighted, Blue Paper with Polkadots from an old Papermania Pad, Echo Park For the Record 2 'Just my Type'.

Other Size Papers: 6x6 Papers from Pink Paislee Portfolio, Papermania Happy Days and Portobello Road, and Bazzill Basics Papers Dino-Mite. Offcuts of paper from Pink Paislee Portfolio, Octopus paper from a DCWV All About Boys stack, a small piece of Basic Grey Sultry 'Citron', Echo Park This and That Charming Borders, and A Heidi Swapp Colour Magic Memory File.

Stickers and Alphas: PinkPaislee Old School Border Stickers, Echo Park 12x12" Sticker sheets from For the Record 2 and This and That Charming, Thickers numbers 184 and 231, Papermania Green Cardstock alphas, Crate Paper Acorn Avenue Mini Alphas, Simple Stories Sn@p Mini Alphas, and Cosmo Cricket Tiny Type Cream.

Here's the journaling blocks, stamps, and tags:


All of the journaling blocks, stamps, and tags are from either Pink Paislee, Echo Park, or Elle's Studio, expect for a ruler stamp from Maya Road, some tab stamps from Studio Calico, and a few handmade journaling blocks (more about these tomorrow).

Finally here are the other embellishments:


The arrows down the left are mostly handcut from a sheet of Echo Park Note to Self paper, plus a couple are from an old Basic Grey embellishment sheet. Then there's lots of gems (of course), from Papermania and My Mind's Eye, plus some pearls from Kaiser Scrapbook. The Label stickers and Photo Tabs are from Pink Paislee Portfolio. The two vellum bags are handmade, and the paper bag was from an Elle's Studio kit. There's buttons from Bazzill Basics Dino-Mite, and a random selection from my stash. I've added red Liquid Pearls, and Mister Huey Honor Society and Letter Jacket Mists. The Flair is from Scrap and Create, and the Wood Veneers are Freckled Fawn. There's a small piece of a Hambly Overlay. The stickers are Dino-Mite and the Photo Frames are Portfolio. Plus I added a few random washi tapes, twine pieces, and butterflies!

Phew! That lot should keep me going for a while, don't you think? It should certainly be good for some boy pages, and I added lots of 'everyday' bits too as I want to capture some of those 'little moments' in my projects this month. We'll see how it goes!

I'll be back tomorrow (February 2nd) with tutorials for how I made these:


See you then! Don't forget to hop on to Julie at His Glory Girl to see what goodies are in her kit this month!

x

P.S. Did you see the desk calendar I made with the last of my January Counterfeit kit? It's right HERE!
Related Posts Plugin for WordPress, Blogger...