Sunday 19 June 2011

Catch up: cards 'n' stuff!

I know it's been over a week since I posted, but I've been a busy-bee behind the scenes, getting ready for the baby (less than 3 weeks to go until due date!), planning my best friend's Hen Weekend (next weekend!), and making lots of bits and pieces, some of which I can't show you yet.

I haven't been on the internet much because of all this, and I got a nice surprise when I logged on today and checked the Polkadot Door Designs blog - I've been voted their 'featured designer' for June!


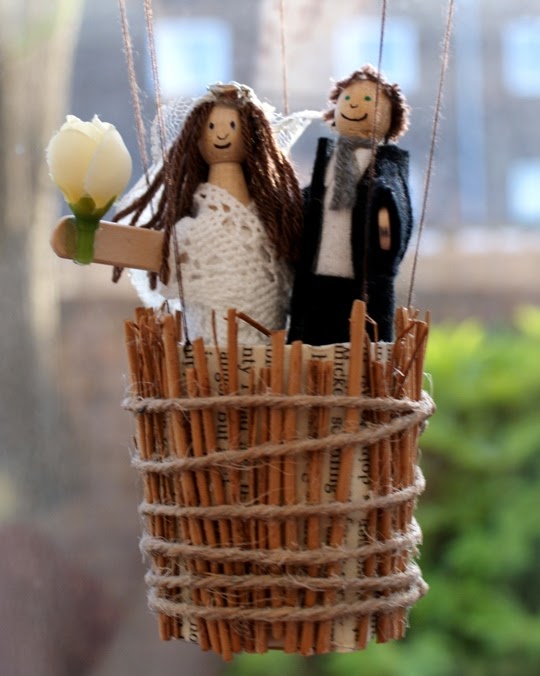
Very exciting! I loved taking part in the blog hop, and making my hot air balloon project (if you missed my blog hop post you can see it here). I can't wait to see the projects made for the July blog hop - I've seen a sneak peek of the July inspiration photo and I can tell you the creations will be fabulous, so don't forget to look out for it.

I've made a few cards over the last week or so, the first was for my little sister who turned 20 last week:


She's travelling in Australia at the moment, so I took lots of photos of the card and sent them to her on facebook, I had not been organised enough to post it to her! We chatted to her on Skype on the day though, and she was having a wonderful time of course!

I also made some father's day cards. I make cards every year for my dad, my step-dad, and my father-in-law. I usually make them all different, but as I'm so busy this year I just chose one design, and then used different colours for the three cards. If they ever find out I'm sure they will understand!:


I also made a little something for me this week. It's my birthday next Friday (24th), and I know what I'm getting for my pressie - an ipod touch. I'm very excited about it! In preparation for this I made the free smart-phone felt case which came with last month's Mollie Makes magazine. I used my own design as I wanted an owl on it, and I added some turquoise felt, and a popper so the ipod doesn't slide out so easily.


The blanket stitching isn't the neatest I've ever done (I sat up until 1am one night to finish it!), but I like the case, I just can't wait to put my ipod in it!

Now we're off strawberry picking, my hubby's choice for how to spend father's day. I took this photo of him and our little girl yesterday at a local summer fair, they look so cute together:


Bless! x

Friday 10 June 2011

10 things my daughter says a lot!

See Shimelle's blog here if you want to see why I'm listing 10 things!

Here's 10 of my daughter's phrases which are well used at the moment:

1. "Scrubbly" - as in, 'it's all lovely and scrubbly', or 'that's too scrubbly' - I think it's her word to use when she doesn't have a word that fits!

2. "The naughty crocodile did it" - she won't admit to being the culprit at the moment. This last week she has cut off a bit of her hair, and spilled a drink of apple juice all over the coffee table, but it wasn't her - it was the naughty crocodile.

3. "Smile at me mummy" - when she knows she's being annoying she gives me a very cute, smug smile, and gets upset if I don't smile back.


4. "Just pause it, I need to talk to you" If we ask her to be quiet when something good is on the telly. Of course, we can't talk during her programmes!

5. "Just a little bit more playing" or "play with me a little bit mummy?" - kind of irresistible, even when we're late getting ready to go out.

6. "I'm not a girl, I'm a pussycat" - or a tiger/lion/doggie - there's been a lot of crawling around on the floor lately, even in the library.

7. "I'm good at winning aren't I mummy?" - we've been playing a lot of 'snap' with Disney princess cards. She's surprisingly good at it. Or I'm just really bad at it!


8. "I need a huggle" - I really don't want to correct this one, I love it that she's put the words 'hug' and 'cuddle' together! She pronounces most words really well so I'm letting a couple of wrong ones slip through for now as they're just too cute! Another one is 'forgetti' instead of 'spaghetti'!

9. "I'm going to be bigger soon" or "I'm going to be four soon" - her birthday isn't until March. Why do they start wanting to grow up so young?

10. "Love you mummy / daddy" - Ok, I know this one isn't funny, but it's my favourite thing she says, for obvious reasons!


Do you know any kids with cute phrases? x

Wednesday 8 June 2011

Counterfeit Kit 2 May Pages and JUNE Kit!

I wasn't going to make a June counterfeit kit. I really wasn't. (If you don't know what I'm talking about see the Counterfeit Kit Challenge Blog). I still had lots left in my May kit. But then I saw Clair's kit, and spotted the cloud paper she'd added, and I remembered a piece of cloud paper I had that I could add to the kit. So I thought, oh, I'll just make a smaller kit this month. But of course, once I started pulling bits together I just couldn't stop! So it's at least as big as last month. And even though my kit looks nothing like Clair's, I'm still going to blame it on her that I caved in and made one!

I will show you my June kit. But before I do, to make me feel better about it, I made two last pages with my May Counterfeit Kit to use up some more bits before I integrated the rest back into my stash. So here's those two layouts:

Layout 1:

Background Paper = Reminisce 'Princess Stripe', Alphas = Doodlebug Design 'Alphablocks',
foam white 'fun' from Sifcon Int, Card behind title = DCWV 'Glitter Cardstock Matstack,
Frame Unknown, Card behind photo = Papermania Scalloped Cardstock,
'Baby it's hot' = Bella Blvd SHS 'Borders n Blocks', 'Happiness' sticker = Papermania,
Tag = homemade, Assorted brads and a button.
This was quite a basic layout for me - hardly any layering - but that background paper was so bright I couldn't add too much to the page. Plus I didn't want to detract too much from that gorgeous smile:


Layout 2:

Background Paper = Papermania Yellow Cardstock, Green Card behind title & Blue Card behind houses also Papermania, Patterned Paper = Junkitz 'Salsa Hoops', Houses strip = Bella Blvd SHS 'Borders n Blocks',
Brown Luggage Tag = WHSmith, Train stamp = Royal & Langnickel 'journey',
Journal Pen = Sakura Gelly Roll 'moonlight - blue',
Alphas = Papermania 'Felt Alphabet', Royal & Langnickel 'Baby Blocks Alphabet',
Papermania 'Dome Stickers Alphabet', Assorted Embellishments.
 I wrote 'chugga-chugga' all around the yellow cardstock border because that's what my daughter says for 'train noises'!


So those pages used up a lot of my May kit. I've put the leftovers back in with my stash, except for a couple of bits which I was able to add to this month's kit. (This month we're counterfeiting 'Burlap & Buttercups' current kit.) Here's my take on it:


The Papers:


I'll list the paper manufacturers etc. when I use them like I have done on the layouts above, if you're desperate to know what any of them are then just ask and I'll let you know!

I home-made these embellisments (except for the birdies, which are cut from a patterned paper scrap):


I followed this tutorial for the bakers twine, I used an off-white colour yarn, with green thread on the reel and blue thread in the bobbin. I was quite pleased with how easy it was, I'll be making more of this I think!

So there we go, I'm all ready to join in for another month. I just have to find time to scrapbook now! x

Tuesday 7 June 2011

**giveaway winner - + etsy shop special offer!**

Hello all! Sorry this post is a bit late, I've had troubles uploading a video but it's sorted now!

It's time to announce the winner of one of these kits available in my Etsy shop (if you're not the winner then keep reading for a special offer on the kits):


Here are the names of everyone who commented about their favourite kit (name written out twice if you also mentioned being a follower):


I folded all the names, put them in a glass bowl, and had my daughter pick out a winner, here's the video of her plucking out the name (if you don't want to watch the video you can just scroll down to read the winner's name):


So the winner is...

...

Annie!

Annie said:

I love the gentle romance set, but they are all lovely! I love that you've made it all, the fimo buttons are fab.

Annie B

So congratulations Annie, a Gentle Romance Kit will be on it's way to you as soon as I have your postal address! Email it to me at: jennifer grace (at) hotmail (dot) co (dot) uk.

If you're not Annie and you didn't win then don't be disheartened - for one week only I'm doing a special offer on these kits - I've taken a $1.50 off the kit price. So if you'd like a chance to play with one of these kits head to my Etsy shop to grab it now - the price will go back up next Monday (13th June).

I've also added a few other bits to my shop today:


Okay, that's all the Etsy plugging I'll be doing for a while! Thanks to everyone whose said nice things about the kits, the projects I've made with them, and for wishing me well on the Etsy venture. I promise my blog will not become all about the shop!

In fact, to prove this, my next post will be about my June Counterfeit Kit... watch this space! x

Sunday 5 June 2011

*gentle romance projects

I have one more of my kits to show you some example projects for.
This is the Gentle Romance Kit:


Lots of soft, pretty colours, so of course I had to make something for my little girl using this kit! She was a bit jealous of my altered vest top, so I altered a white one for her:


I used two 7" strips of the pink lace trim to stitch onto the shoulders:


And then pinched a bit of the bottom of the vest top and stitched it to hold it up - I could then sew a 7" strip of the floral fabric behind it, so it peeps through. And I added the cream crochet flower, a fabric covered button, and the fimo heart button:


My little girl especially likes the heart, she keeps looking down at it!

I used most of the rest of the kit on this layout:

Background Paper = WRMK 'Girls Night Out - Vavoom', Kraft Paper = Paperchase,
Photo Mat Paper = Papermania 'Exquisite' 6x6,
Alphas = Crate Paper 'Crate Avenue', Doodlebug Design 'Just Plain Simple', Papermania 'Curly Pink',
Thickers 'Gift Box', Foam Letters Unknown, Exclamation mark - Thickers 'Roller Rink',
Journal Spot and cut out sheep = Papermania 'Honey & Hugs', Stamp = Studio G,
Fake Stitching = Sakura Pen-Touch White Opaque Medium,
Everything Else from Gentle Romance Handmade Embellishment Kit.


I love this photo of my daughter from a farm visit, she wasn't convinced it was a good idea when she was told she could stroke the lambs!

I machine stitched the fabric on, just adding the pleats as I went, and adding the crochet flower near the woolly sheep:


I used up some more of the kit on this birthday card:

Card Blank = Papermania A6 Kraft Cards, Stamp = Whisper's Words,
Paper Scrap Unknown, Fake Stitching done with  Uniball Signo White Gel Pen.


I like the layout of the elements on the card, it makes me think of a layered cake. I've turned it into a quick card sketch for you if you'd like to try it out:


Let me know if you give this sketch a go!

I used the last two bits from the kit - the flat felt flowers, to make this brooch:


With a little embroidery and a few beads added. Here's my lovely daughter modelling it on her hat:


The Gentle Romance Kit is available in my Etsy shop. Please take a look!

Hope you're having a lovely Sunday, x

Friday 3 June 2011

Summer Brights Projects

It feels appropriate that I'm posting my projects made with the Summer Brights kit today, as it's been boiling hot here, with glorious sunshine in a vibrant blue sky all day. Very nice I'm sure, but at 8 months pregnant it's a bit too sweltering for me!

Here's the kit I've used:


And I utilised it on a layout, a cuff bracelet, and on altering a top.

Here's the layout, a nice colourful one to match the kit:

Cardstock = Papermania, Alphas = Thickers 'Sprinkles' and 'Rootbeer Float', Also used a cocktail stick
and home-made acrylic mist, Everything Else from Summer Brights Handmade Embellishment Kit. 

I wanted to mist the yellow cardstock, but leave a rectangle in the middle free for the photo, embellies, and title to stand out. So I simply cut a rectangle of paper and stuck it onto the cardstock with low-tack masking tape while I sprayed the mist:


And then once it was dry I just had to write the journaling and stick everything down! I used strong glue dots to adhere the summer brights embellishments to the page. The fabric along the bottom is about 10.5" long, so there was some left for my cuff bracelet! 

I made an extra embellishment for the page by glueing (I used Copydex) a tiny scrap of the vintage fabric onto white cardstock, cutting it into a triangle, then piercing a cocktail stick through it, so it looked like a little flag. It helps balance out the layout - otherwise the right hand side was heavier because of the journaling:

I took what was left of the vintage fabric, and used it as the main inspiration for this cuff bracelet:


As the fabric was just under 8" long I cut a 8¼” x 1¾” piece of denim from some old jeans to back the fabric with and give it strength. I didn't hem the edges as I wanted them to fray:


Then I just sewed the fabric button and blue crochet flower onto the vintage fabric, machine stitched the vintage fabric onto the denim, and then made a button hole. It was the first time I've ever made an automatic button hole using my machine, and it took me quite a few goes on spare fabric to get it right! My button was just under an inch across.

I quite like the pretty / rough contrast of the finished cuff:


Finally I used up the bits from the kit by altering a cheap vest top. I had to buy one as I was fed up of my warm-weather tops not quite covering my bump! But it was a bit boring until I added some lace trim and flowers:


Now I feel summery, though still too hot! I definitely think I'll be altering more tops like this though, as it was so easy to stitch the lace trim around the neckline and then sew on the flowers. And it makes my top one of a kind - I like to be different! Have you altered any clothes to make them less high-street?


Hope you've found some inspiration from these projects. The Summer Brights Kit is available in my Etsy shop, along with some kits in different colours.

Bye for now, x

Wednesday 1 June 2011

Polkadot Door Blog Hop!

Do you want to see some fabulous inspiration and have a chance to win a prize or two? Then keep reading, because It's time for the Polkadot Door Designs June Blog Hop!
If you're already hopping along then you should have arrived here via Nicole B's blog. If you have just happened along today then welcome! I was excited to be asked to join in the hop as a guest designer for June - I had so much fun looking at all the DT's projects last month. 

This month's inspiration challenge is this picture:


I was inspired to create this:


If you'd like to create a balloon of your own you can download this template by clicking on it (you should print it out at A4 size):


I cut five of these shapes from scrapbook paper (I cut a template from cereal packet card to make it easier to draw around 5 times):

Papers = Wube 'Weathered Travel Quotes, Flair Designs 6x6 Calendar Blanks with some bronze acrylic misting,
Sandylion 'Treasure Map', K&Co '12x12 Life's Journey Dictionary'.

I machine straight-stitched them all together about 5mm in from the edges. I kept the threads long when I cut them off, so that they could be used to hang the basket underneath, and to hang the balloon from the ceiling at the top:


The balloon looked like this all stitched together:


I was able to put my hand inside to gently push out the paper and make the balloon shape:


I don't have photos for all the other steps. My basket started out as a yoghurt pot though:


I covered it in book paper using matt gel medium, then tied twigs around it using brown string to make it look more basket / nest like. I used a paper piercer to make holes for the balloon strings to go through - making sure one side was more open so the bride and groom didn't have strings in front of their faces.

The people were made from dolly pegs, their clothes and hair were mostly stuck on with a hot glue gun. I used a bit of lace trim for the bride's veil and an old (cheap) ring of mine for her tiara!

I used part of the phrase from the inspiration picture, but changed it so it became 'How much more beautiful life becomes with love':


I think this happy couple are going to float off into the sunset, while I hop along to the other DT blogs! Here's the list of everyone on the hop:


You should check out the rest of the hop - not only am I sure that they'll be lots of fabulous projects to see, but you also have a chance to win some tags from Berry71Blue if you complete the hop, and from PinkPearlStudio if you join in with the inspiration challenge - which could also give you a chance to be on the July design team (for details on entering the inspiration challenge see the Polkadot blog current challenge page).

The next stop on the blog hop is also the last (but by no means least)- you're going to the Polkadot Door Designs blog. Once you get there you can vote for your favourite designer from the hop (for them to win a prize and the 'featured designer' spot), so if you like my project the best please vote for me and I'll send happy vibes your way!

Before you disappear I have a GIVEAWAY going on at the moment (closing Sunday 5th June), so check it out here to enter for a chance to win one of my handmade embellishment kits.

Thanks for reading,
Jennifer G, xxx
Related Posts Plugin for WordPress, Blogger...