Showing posts with label scrapbook mini books. Show all posts

Sunday, 18 November 2012

Where else I've been Wintering

(This post is part of my Frosty Festivities Blog Event)

I have been preparing lots for this weekend (as you've probably guessed), but I've had a few other winter projects to complete for elsewhere too, and this hour I thought I'd share them with you!

I'm sorry to those who are regular readers and might have seen some of these before, but I shall start with something you're unlikely to have seen (I haven't told you about it, but you may have heard of it elsewhere!)...

Snowed In Magazine:


Ashley Pahl's free online Snowed In Magazine is full of extremely lovely seasonal delights, including crafts and recipes. It also features a pendant by me! It's completely different to the other pendants I've shown this weekend, you'll have to go and check out the magazine if you want to see it!

Speaking of magazines, I was also in the Christmas special of the Popular Crafts magazine (sadly the last ever issue of Popular Crafts) with this mini-album:


It documents our Christmas decorations. Sorry you can't see this magazine online, it's only available in UK stores I believe, but I did blog about our Christmas decorations as my 10 things on the 10th post last December - you can see it here. 

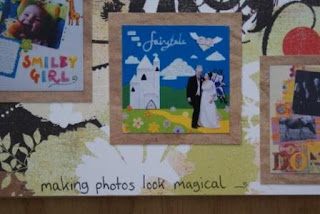
Finally, in case you missed them, I featured in two wintry posts on the SJ Crafts Blog this week. One was all about me, and how I'm Inspired by Winter, which is here, and the other was the latest SJ Crafts challenge, on the theme of Christmas, which is here and features this layout by me:


Please check all them out if you haven't seen them already!

Be Inspired:
  • Create a mini book which could be used as a decoration, to document your winter or Christmas
  • Put a giant gold bow onto a project
  • Find something in a magazine to use as inspiration for a winter-related activity

Don't forget that a comment on this post, or on any of my posts from this weekend, will count as an entry into the Grand Giveaway {NOW CLOSED} - but only if you've registered your interest in winning that here!

I'll be back at 5pm! (I hope!) x

December Daily / JYC

(This post is part of my Frosty Festivities Blog Event)

Last year I tried out a December album for the first time. I joined Shimelle's 'Journal Your Christmas' class, and prepared my album, even stitching lots of 8x8 page protectors to make them 4x8, and cutting all the papers to size, and making all my 'dates'. I only completed it up to day 4!

I blame the fact that my baby was still quite young (5 months old) at the time, we were away for Christmas, and I was using old supplies that didn't really excite me to create.

So I'm giving it another go this year - now baby is a bit older (and sleeping through the night - yay!), we're at home this year, and I've got lovely new stash to play with!

I've decorated the front of my album:


I'm using Pink Paislee's Portfolio album. I've misted the cover, first with two layers of Letter Jacket Mr Huey Mist, then one layer of Heidi Swapp Gold Lame Spritz, and a few droplets of White Calico Mr Huey's.

The rest is a variety of Pink Paislee City Sidewalks, Artisan, and Portfolio items, plus Studio Calico Hey Day numbers, and some gems (of course!). I took the album out of it's protective cover to decorate and photograph it, but it's back inside it now - I love that it has a clear protective cover so my gems and ephemera won't get knocked off:


I haven't done much of the inside yet, but when I've had off-cuts of paper from other projects I've begun cutting them down to slip into the page protectors. 

Most of the dividers will work well with the colour scheme, but I took out the bright yellow one and made a replacement from a sheet of Crate Paper 'Rudolph' paper, which I love love love:


And I know that I'm going to use the Crate Paper Sleigh Ride vellum numbers for my dates, except for the 25th, which I'm using a piece of City Sidewalks ephemera for. I've also put by a few other embellishments that I really want to use in the album (I want to keep them for myself rather than using them on cards!):


Otherwise I shall just be using bits and pieces from my new and old Christmas stash boxes. I shall keep cutting down bits of paper in preparation, and maybe die-cut some shapes and words. I think I'll be ready by the 1st of December to give the project a good try!

Be Inspired:
  • Do some misting or painting to turn something bright red/gold
  • Add some white ribbon or embellishments to your next wintry project
  • Start cutting your paper scraps down to squares or rectangles ready to go on something


Don't forget that a comment on this post, or on any of my posts from this weekend, will count as an entry into the Grand Giveaway {NOW CLOSED} - but only if you've registered your interest in winning that here!


Are you doing an album this December? I know some of you are! Leave a link in the comments if you've already blogged about your preparations! See you again soon. x

Friday, 31 August 2012

My LSNED 2012 Album - Template and Tutorial Included!

The 1st of September is creeping up very quickly, but I've managed to prep my Learn Something New Everyday Album just in time! If you don't know what LSNED is all about, it's an annual class by Shimelle Laine, and you can see more details on her blog here.

I've taken part in the class for the last two years, and I love both my albums, for the little details of life that are recorded in them. You can see my art-journal album from 2010 here, and my smash-style album from 2011 here. This year I decided to take inspiration from a previous project of my own - my Mini File-Folders Album from my Organisation Celebration weekend. I like the size and fun of it, and I'm hoping it will work well to record this month's lessons! 

This time I didn't have an empty soup box ready though, so instead I decided to make a box out of a sheet of cardstock. And just in case you'd like to make an album this style for yourself, I have a template and tutorial for you!


I'm using the Echo Park Every Day Eclectic Collection Pack, with a few other bits and pieces thrown in! 

To start making a similar album of your own, you'll need a bit of 12x12 cardstock, the sturdier the better. I've used a piece of Bazzill Basics textured cardstock in an aqua colour.

You can download the template here - it needs to be printed onto an A3 piece of paper. Sorry if you don't have access to an A3 printer, but I have included the measurements on the template, so you could draw it onto your cardstock by hand.


Cut the template out, and draw around the outline - I used a ruler to help me keep the paper still, and make sure the lines were straight:


Fold along the dashed lines, and draw them onto the carstock too - make sure you draw them dashed so you remember not to cut along them:


Cut out your box, then score and fold along the dashed lines:


Flip the box over, and apply ultra-strong double sided tape to the tabs which will stick the box together:


Peel off the tape backing and carefully stick your box together:


Decorate the front of your box with papers, letters, stickers, and jewels! I used Foam tape and dots to help some of the details stand out more:


To make the pages, cut a selection of papers down to 4" x 5½". Decide on the order you want the pages to appear, and then cut tabs along the top, by measuring half inch square tabs, and cutting off the excess at the top of the paper:


You can leave the tabs like this, or decorate them if you wish. For my previous file-folder album I used a variety of chipboards and other bits for the tabs, but as this is an album with daily entries, I used some Maya Road Numbers to 'date' the pages:


I love how they look peeping out of the top of the album - I've used kraft in some way or another on each LSNED album so far, a tradition I hope to continue!:


There we go, all ready to fill throughout September. I hope to share some pages from the album every few days. Are you joining in? If so, I hope to see you on the forum! 

I should be back tomorrow with my Month in Numbers! x

Wednesday, 22 August 2012

Little Bo Peep Sneaks

My latest DT projects went live today on the SJ Crafts Blog, here. They were made using the very pretty Little Bo Peep collection by Crate Paper. I absolutely love this collection, the colours are so rich, yet so soft at the same time! You can see all my projects on the shop blog, but here's a couple of sneaks to tempt you over there:

A Tag Mini-Book:


A New Baby Card:


Please go and check the rest out - there's a layout over there too!

I hope you're having a sweet day, x

Friday, 17 August 2012

Away We Go To The Beach - Mini-Album

Regular readers will know I take a lot of beach photos. I had some printed out that I'd decided not to use on 12x12 layouts, but I still wanted to scrapbook them. So, as I was in a summery scrapping mood,  I've made a mini album to display them:


I made the pages by cutting 5 pieces of Echo Park Everyday Eclectic paper down to 5" wide - then rounded off the top edges of the papers using a bowl as a template:


And I cut the height of the pages down so that they increase in size - the front cover is 6" tall, the first page is 7", the second page is 8⅛", the third 9¼", the last page is 10⅜" tall:


And then I decorated the album with more Everyday Eclectic bits, a little machine stitching using white and gold thread, a Papermania Brad Making Kit, buttons and gems from my stash, plus some of these epoxies which have been sitting in my stash for too long:


They went well with the theme:


The photos were various sizes and orientations, but I managed to cut them all down to 4x4" square to give continuity to the album:


I love making mini albums at the moment - I have them all on display in a basket in my dining room, for visitors to peruse!

Have you got any photos printed out and lurking in storage that you could use in a mini-album? Don't forget you can link up mini-albums to my Scrapbooking Soiree, as well as layouts!

x

Thursday, 14 June 2012

21st Birthday Card with Bunting Tags!

I wanted to create a really special card for my sister for her 21st Birthday, so I came up with this one. It's not just a card, it's also a mini-book and birthday decorations all rolled into one!

(Scroll down for a slideshow with close-ups of each page.)

The front of the card looks simple enough:


But the photo comes off to reveal writing on the back of it, and a 'Happy Birthday' message behind (photo of this in the slideshow below). 

And then the card folds out to form an accordion book:


I made the base of the book following the same principles as the credit-card sized mini I made here, but I cut the rectangles a lot larger - 6x12" - before folding them, corner-rounding them, and sticking them together.

Each of the tags sits in a little pocket which I made by sticking ultra-strong double-sided tape to three sides of a piece of paper, before adhering it to the card:


So that each tag can be taken out of its pocket, one at a time or all together, to read the writing on the back:


And then they can be used as bunting for a birthday decoration:


After the celebrations, they can all be tucked back into the card, to be kept and perused like a mini-book.

Here's a slideshow, with close-ups of each page, and a picture of the envelope I made for it too:


I used mainly Crate Paper supplies, from a mix of collections. Punching lots of butterflies (using the Martha Stewart Classic Butterfly punch), and using little bits of border stickers, meant I was able to use up lots of scraps. It's cleared some space for me to order in the new Crate Paper Little Bo Peep and Little Boy Blue collections - yay!

See you again soon! x

Friday, 20 January 2012

Happiness is...

I know I said I'd be back with my word for 2012, but there's been a change of plan. Today I'm going to show you a little mini-book I've made, as an example for the first S J Crafts blog challenge, which went live yesterday:


If you enter the challenge you'll be in with a chance to win a £10 gift voucher for the S J Crafts online shop. The theme is 'happy' and the added extra is to 'use a punch'. The closing date is the 15th of February. See all the details on the shop blog here, along with the rest of the DT's examples.

I was inspired to make a very-mini mini-book, credit card sized, so that I can carry it around in my purse and look at it every time I want to be cheered up!

To make it I cut 3 rectangles from My Mind's Eye 'Rosy' 6x6 papers, the rectangles measured the width x twice the height of a credit card (aprox 3⅜ x 4¼" - credit card was approx 2⅛" tall). I folded the rectangles in half, and whilst folded, I rounded the corners with a woodware corner rounder punch. 
:


I put glue-stick all over the back of my centre rectangle, and then stuck half of the other two rectangles to it, so they were overlapping, and formed a simple accordion-style book:


Then all I had to do was decorate it! Throughout I've used My Mind's Eye 'Rosy' clear stamps (stamped with VersaMagic 'Jumbo Java' ink), 'Ordinary' Label Stickers, and butterflies punched from 'Rosy' papers using the Martha Stewart 'Classic Butterfly' punch; My Little Shoebox mini-alphas, and tiny photos!


I love it, it makes me smile whenever I open it, and it was so quick and easy to make. Also, because I now carry it around in my purse, it will come in handy next time I'm out and someone asks me what 'scrapbooking' is - I don't think anyone really understands until you show them an example!

Don't forget to check out the challenge and maybe have a go at entering. It doesn't have to be a mini-book, it can be any kind of layout, card, or other papercraft project. What does the word 'happy' mean to you?

Bye for now! x

Wednesday, 1 September 2010

An exciting start to September!

Hello! I'm in a very good mood today!

Firstly I had a good driving lesson this morning - managed to do a few 3 point turns!

Secondly it's the start of Shimelle's class Learn Something New Every Day. I've just finished off my front cover:


I'm going to try and stick to this colour theme through the book, though I don't suppose I'll be terribly strict about this! The book is from Paperchase, and is about 8" x 6". The best bit about it? It has brown kraft pages! Love them, can't wait to play with them! I'm going to combine scrapbooking and art journaling depending on my mood. Hopefully they'll be some good lessons learnt this month!

My third reason for being in a good mood is that I can finally share some news with you - I'm on the Fiskarettes Design Team for the next three months - yay!! The announcement went live this morning - you can see it here. I can't wait to play with their products and share lots of pretty stuff with you and the community over there. If you've never visited, go take a look!

Finally, we bought a printer off Ebay and it arrived this morning. It's a huge beastie - as it's an A3 printer, with an A3 scanner built into it - yipee! I'm looking forward to being able to scan some of my pages instead of having to stick them to the bathroom wall (only white wall in the house), and hoping that I don't forget to take it down before someone gets in the shower! Just have to wait for hubby to install it.

Now it's time to go and play with my little girl. She's heaped a Snow White and a Sleeping Beauty doll on my lap - I get the hint! xxx

Sunday, 31 January 2010

This is why I scrapbook...

Well I've been making a mini book for Shimelle's challenge (see her original post here), and I finally got it finished today. I've been away working this weekend so it's been a bit of a struggle to get it finished, and I've just been having a fight with blogger which wanted to rotate all my photos onto their side - grrr. But I've been determined to get it posted as I had a lot of fun making the album and want to show it off!

I decided my reasons for scrapbooking were:
  1. For Love
  2. To Preserve History
  3. To Capture Moments for the Future
  4. To be part of a Community (inc. Blog Love)
  5. To be Creative (inc. Making Photos look Magical)
  6. For Pretty Papers (and a good Excuse to buy them!)
The size is 4"x8", the covers are chipboard covered in papers, and the rest of the pages are card/paper/acetate. If you want to see more details of papers and embellishments I used see my post here from when I put them all together. I did include other bits from my stash too of course, especially some Anita's gold 'glitterations' lettering and a few sheets of My Mind's Eye 'Wild Asparagus' papers, both which I bought the other day and had to use straight away! (Except I've used a lot of the letters up on this project so of course I had to buy another pack!)

Here's the book:


(I was inspired to put a key on the front after reading a Copy+Paste blog post here, I have been working on a key necklace too which I shall post when finished!)


Journalling reads:

There are not enough words to say how much I love my family and my friends.
Some photos make my heart ache with it, and taking the time and care to scrapbook these helps me express how much I love you.


Journalling reads:

These photos are of my granny and grandad and my nanny and grampa, getting into taxis on their wedding days.
I love that scrapbooking has inspired me to copy their old photos and ask them about their experiences - I don't want their memories to be lost. I can't believe I might not have thought to get these, if it wasn't for my hobby. xxx


Journalling reads:

Without scrapbooking people may forget that we're all laughing because a donkey has just walked past the window!


Journalling (on little heart) reads:

SJ's blog taught me how to make this (arrow to button necklace pic - see my necklace blog post here)


Journalling (inside envelope) reads:

Even though I don't have many direct conversations with other scrapbookers I still feel part of a community, reading blogs helps me to learn and lets me know others share my passion!


SJ's blog also taught me how to make the flower above, see her post here.


Back cover:


I'm incredibly tired now so I'll leave it at that! Hope you like my book, if you like it enough to vote for it, there will be a chance to on Shimelle's blog http://www.shimelle.com/.

xxx
Related Posts Plugin for WordPress, Blogger...